1. What are Snowflake Notebooks?
Snowflake Notebooks are an integrated development environment within the Snowflake platform that enables users to interactively write, execute, and document SQL and Python code in a unified interface. They provide built-in features like visualization, collaboration, and version control.
They provide an integrated workspace for:
- Exploratory Data Analysis
- Develop Machine Learning Models
- Build Data Science and Data Engineering Workflows
In this article, let us explore how to work with Snowflake Notebooks.
2. How to Create a Snowflake Notebook?
Follow the below steps to create a Notebook in Snowflake.
1. Login to Snowsight.
2. Click on the Username on the bottom left of the page. Go to Switch Role and select the desired role that has access to create Notebooks.
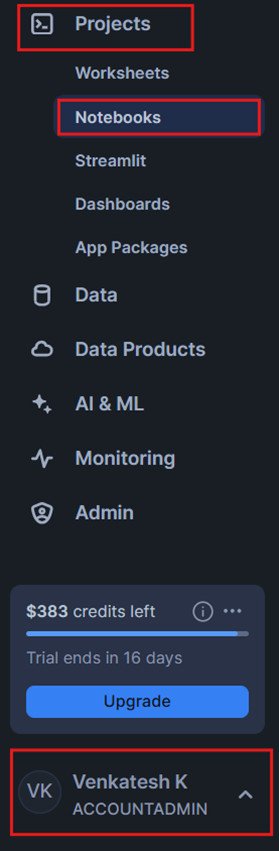
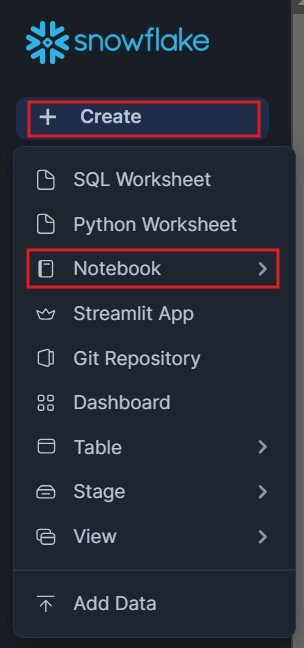
3. Navigate to Projects > Notebooks and select + Notebook.

4. Otherwise, at the top left of the page, select + Create > Notebook > New Notebook to create a Notebook.
4. In the Create notebook window, enter the Name of the Notebook.

5. Select the Notebook location, the Database and the Schema where the notebook is stored.
6. Select the Notebook warehouse where the SQL and Snowpark queries run.
7. Select Run on warehouse as the Python environment.
8. Click Create to create and open the notebook.
3. How to Develop Code in Snowflake Notebooks?
The fundamental building blocks of Snowflake Notebooks are Cells where users can input and execute code or add documentation.
Snowflake supports three types of cells.
- SQL
- Python
- Markdown

As the name suggests, SQL and Python cells allow users to build SQL and Python code blocks, respectively. Markdown cells are used for documenting code content and providing explanations.
When creating a notebook for the first time, three example cells are displayed by default. These can be modified, or additional cells can be added.
3.1. How to Create Cells in Snowflake Notebooks?
To create a new cell in a Snowflake Notebook, click the button for the desired cell type—SQL, Python, or Markdown. A cell can also be created between two existing cells by hovering between them and selecting the option to add a new cell.
The cell type can be changed at any time using the language dropdown menu.
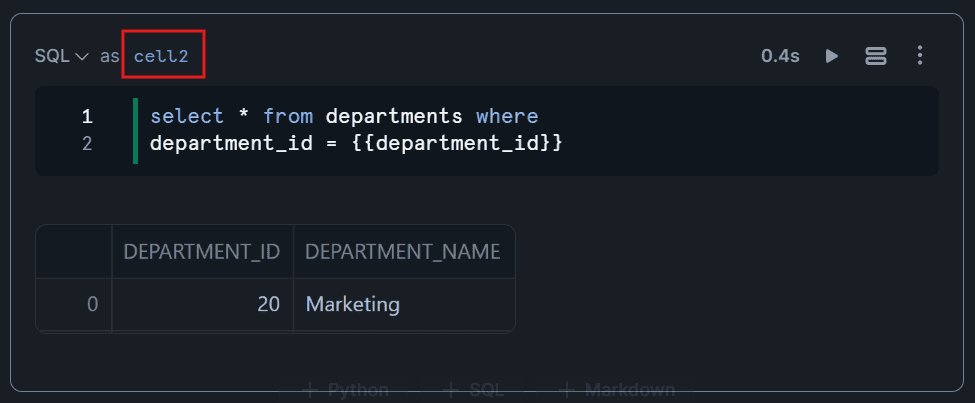
3.2. How to Rename Cells in Snowflake Notebooks?
Renaming cells allows users to provide meaningful names, making notebooks easier to understand and navigate. To rename a cell in Snowflake Notebooks:
- Locate the cell you want to rename.
- Click on the cell title to enter a new name for the cell.
- Click enter to save the changes and the updated name will appear as the cell’s header or identifier.

3.3. How to Move and Arrange Cells in Snowflake Notebooks?
Reorganizing cells helps maintain a logical flow in the notebook. To move and arrange cells in Snowflake Notebooks:
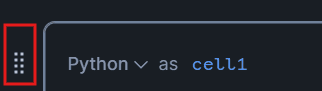
- Drag and Drop:
- Hover over the left or top edge of the cell to reveal the drag handle.
- Click and drag the cell to the desired position.
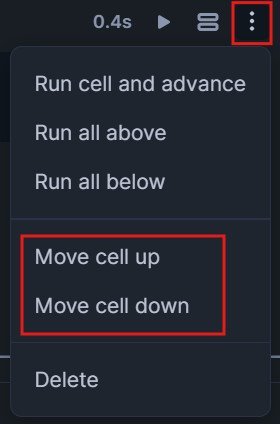
- More Cell Actions:
- Click on the More cell actions option of the cell to open the context menu.
- Use the options like Move Cell Up or Move Cell Down to rearrange cells.
3.4. How to Delete Cells in Snowflake Notebooks?
To delete a cell in Snowflake Notebooks:
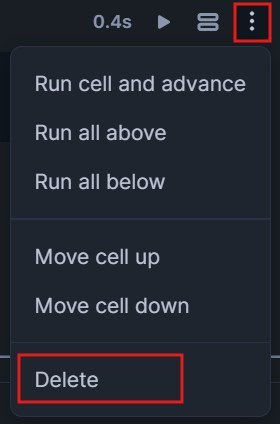
- Click on the More cell actions option of the cell to open the context menu.
- Select Delete Cell from the cell’s context menu to delete the cell.
4. How to Run Code in Snowflake Notebooks?
The cells in Snowflake Notebooks can be run individually or a set of cells in sequence, or the entire notebook can be executed as a whole.
4.1. How to Run Individual Cells in Snowflake Notebooks?
Individual cells in Snowflake Notebooks can be executed to test specific code blocks without running the entire Notebook. To execute a single cell in Snowflake Notebooks:
- Click on the cell you want to run.
- Use the Run button (play icon) on the toolbar associated with the cell.
- Alternatively, press CTRL+ Enter on Windows or CMD + Return on a Mac to run a cell.

4.2. How to Run a Set of Cells in Snowflake Notebooks?
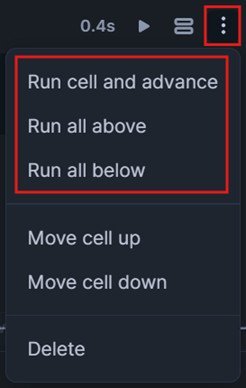
Snowflake allows running a sequential set of cells together without running the entire Notebook. The following options are available in the context menu(more cell actions) of each cell to run a set of cells together:
- Run Cell and advance
- This option allows running a cell and moving on to the next cell after it.
- Alternatively, press Shift + Return on a Mac keyboard, or Shift + Enter on a Windows keyboard.
- Run all above
- This option allows you to run a cell along with all the preceding cells.
- Run all below
- This option allows running a cell and all the cells that follow it.
4.3. How to Run All Cells in Snowflake Notebooks?
All cells in Snowflake Notebooks can be executed sequentially making it ideal for running complete workflows and for validation of the entire notebook.
- Select Run all from the Notebook menu to execute all cells from top to bottom.
- Alternatively, Press CMD + return on a Mac keyboard, or CTRL + Enter on a Windows keyboard to run all cells.

5. How to Reference Cells and Variables in Snowflake Notebooks?
The results of previous cells can be referenced in other cells within Snowflake Notebooks. Variables and cell outputs can be shared and accessed across SQL, Python, or a combination of both.
5.1. How to Reference Python Variables in SQL Cells?
In Snowflake Notebooks, you can reference Python variables of type string in SQL cells to create dynamic queries.
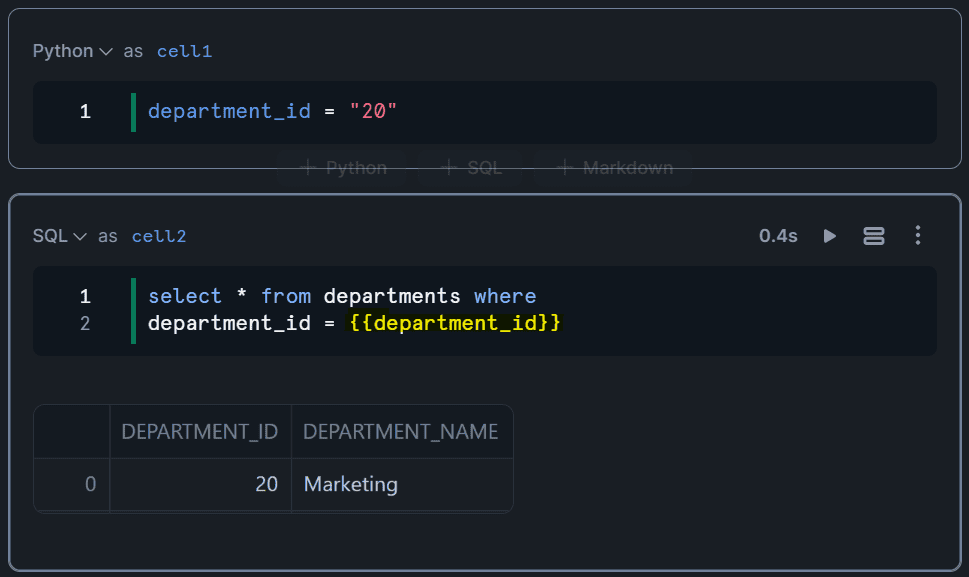
In the above example, the variable department_id defined in a Python cell named cell1 can be referenced in a SQL cell named cell2 by enclosing it in curly braces.
5.2. How to Reference Cell Outputs between SQL Cells?
In Snowflake Notebooks, you can reference the results of a previous SQL cell in another SQL cell.
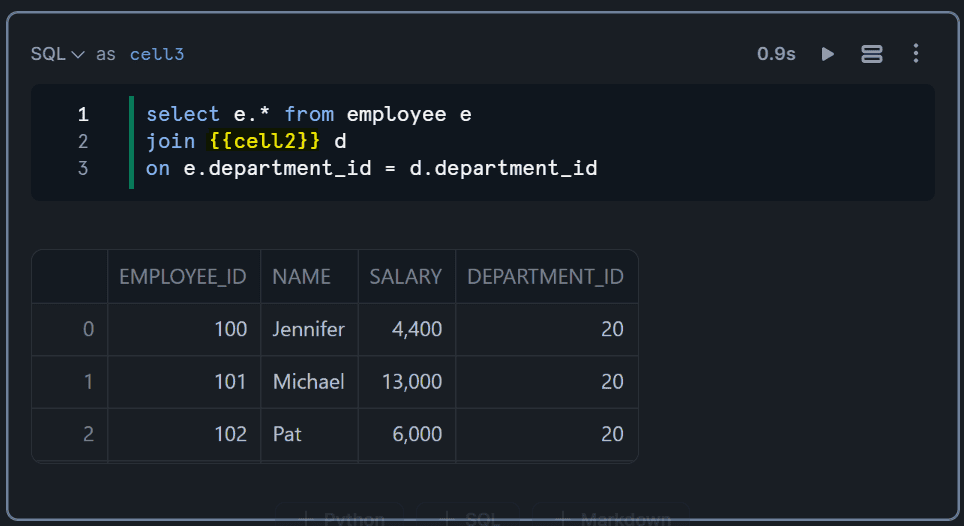
In the example above, the output of cell2 is referenced in cell3 and joined with the employee table based on the department_id field.
5.3. How to Reference SQL Cell Output in Python Cells?
In Snowflake Notebooks, you can reference the output of a SQL cell in a Python cell by converting the SQL results into a Snowpark DataFrame.
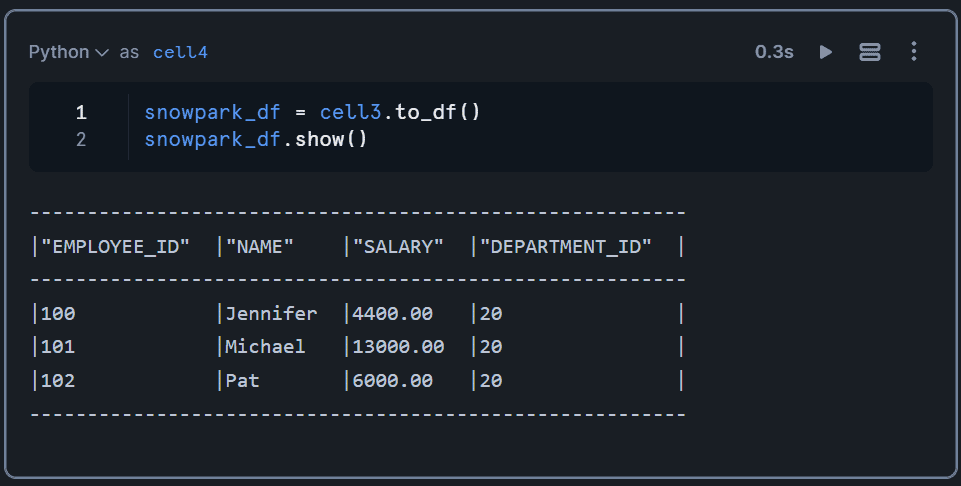
In the example above, the output of SQL cell cell3 is referenced in cell4 by converting it into a Snowpark DataFrame using the to_df() method.
6. How to Schedule Snowflake Notebooks?
Snowflake provides the ability to schedule Notebooks, enabling the automation of data workflows seamlessly. Snowsight executes the notebook in a non-interactive mode, processing each cell sequentially from top to bottom.
When a notebook is scheduled, Snowsight automatically creates a task to execute the notebook according to the defined schedule.
To successfully schedule a notebook, the role initiating the schedule must have the CREATE TASK and EXECUTE TASK privileges.
6.1. Create Snowflake Notebook Schedules
Follow the below steps to schedule a Notebook in Snowflake.
1. Login to Snowsight.
2. Navigate to the Notebook you wish to schedule and open it.
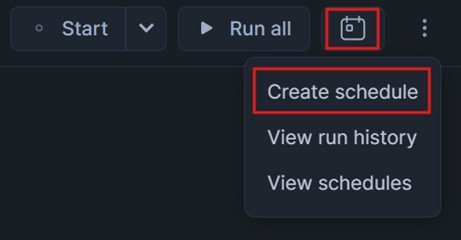
3. In the Notebook, select the Schedule button and then click on Create schedule.
4. In the Create schedule window, enter the Schedule name.
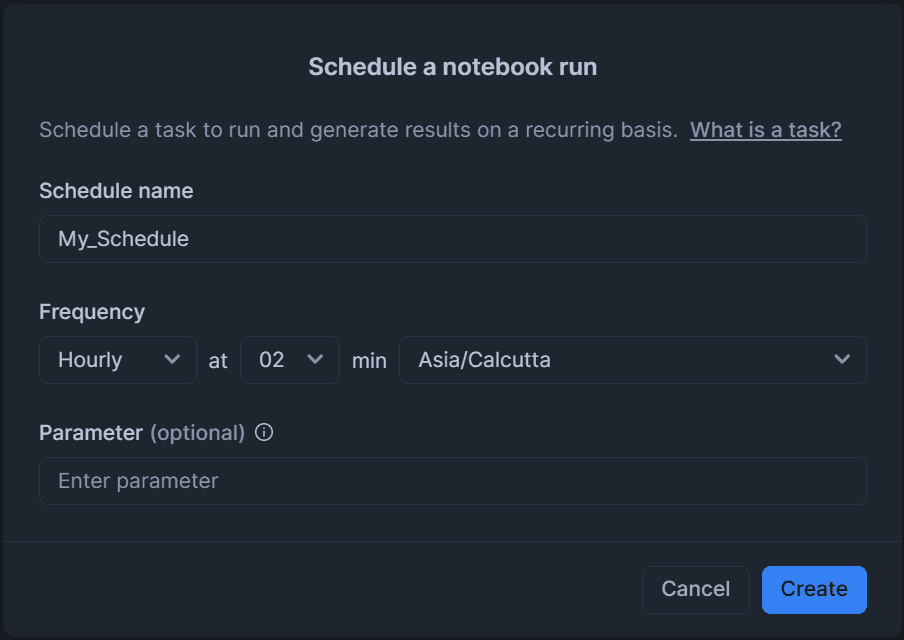
5. Select the Frequency(e.g., Daily, Weekly) at which the schedule should run.
6. Review the schedule details and click Create to schedule the Notebook.
6.2. Manage Snowflake Notebook Schedules
Once a notebook is scheduled, it can be edited and managed through the task that is created and associated with the notebook.
Follow the below steps to manage a Notebook Schedule.
1. Login to Snowsight.
2. Navigate to the Notebook you wish to manage the schedule and open it.
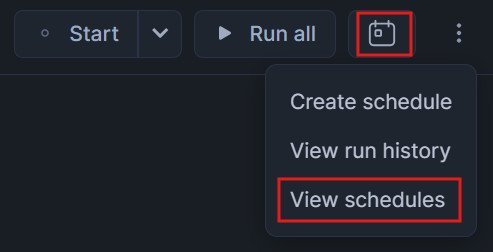
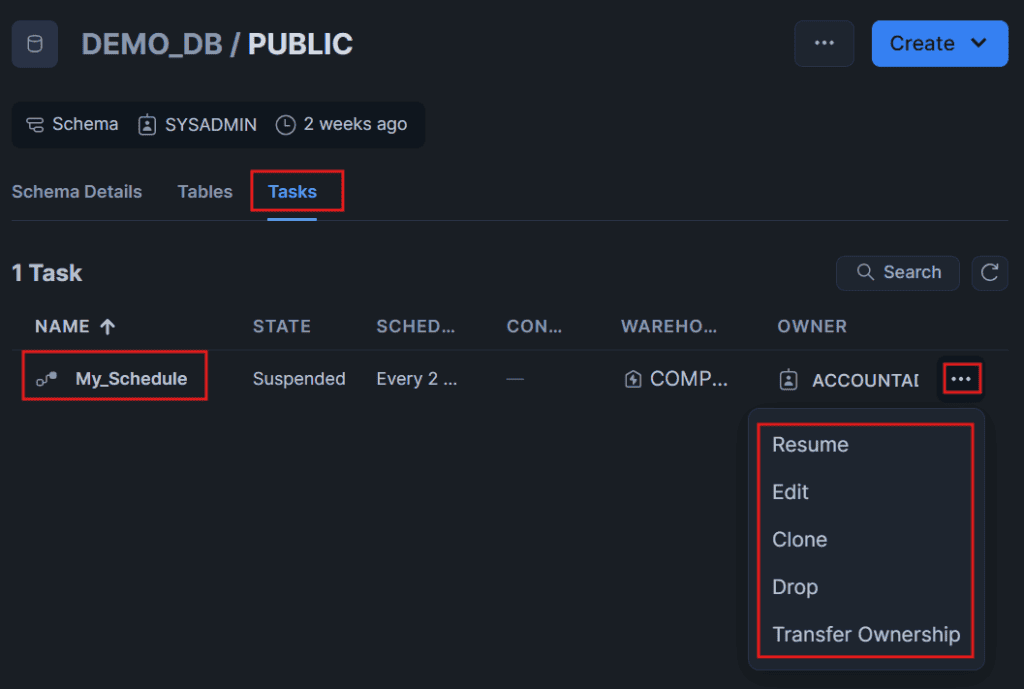
3. In the Notebook, select the Schedule button and then click on View schedules. This displays all tasks in the schema that the notebook is in.
4. Select the task that is associated with your notebook. Use the more actions menu to edit and manage(e.g., Resume, Clone, Drop) the schedule.
7. How to Execute Snowflake Notebooks from SQL Worksheets?
The EXECUTE NOTEBOOK command can be used to run Snowflake Notebooks directly from SQL Worksheets. The command executes all the cells in the current version of a notebook.
EXECUTE NOTEBOOK MY_NOTEBOOK();8. How to Execute a Snowflake Notebook from Another Notebook?
To run a Snowflake notebook from another notebook, use the EXECUTE NOTEBOOK SQL command in a SQL cell, specifying the target notebook’s database, schema, and name. This enables you to chain data pipelines by calling one notebook from another within the Snowflake environment.
EXECUTE NOTEBOOK my_db.my_schema.my_notebook();9. Conclusion
While there is much more to explore about Snowflake Notebooks, I hope this article has provided you with a solid foundation, especially if you’re just beginning your journey with this powerful tool. As suggested by the title, this is a brief introduction to Snowflake Notebooks, designed to get you started and inspire further exploration.
Key Topics Covered in This Article:
- What is a Snowflake Notebook?: An overview of its purpose and functionality.
- How to Build and Run Code in Snowflake Notebooks?: A guide to creating, executing, and managing code cells.
- Referencing Variables and Results Between Cells: Techniques for leveraging outputs and variables across SQL and Python cells.
- Scheduling and Executing Notebooks: Insights into automating workflows and running notebooks both within and outside Snowflake.
Stay tuned for more in-depth and informative content on Snowflake Notebooks!!
Subscribe to our Newsletter !!
Related Articles:
- Overview of Snowflake Time Travel
- Snowflake Zero Copy Cloning
- Snowflake Information Schema
- Snowflake Resource Monitors
- Snowflake Virtual Warehouses
- Snowflake SnowSQL: Command Line Tool to access Snowflake
- HOW TO: Remove Duplicates in Snowflake?
- HOW TO: Get DDL of database objects in Snowflake?
- HOW TO: Find and Kill long running queries in Snowflake?
- HOW TO: Send Email Notification in Snowflake?
- Snowflake Alerts: Schedule Conditional SQL Statements
- Snowflake Tasks: Execute SQL Statements on Schedule
- Change Data Capture using Snowflake Streams
- Change Data Capture using Snowflake Dynamic Tables
- Common Table Expressions (CTEs) in Snowflake
- Introduction to Snowflake Notebooks