1. What is Snowflake Snowpark?
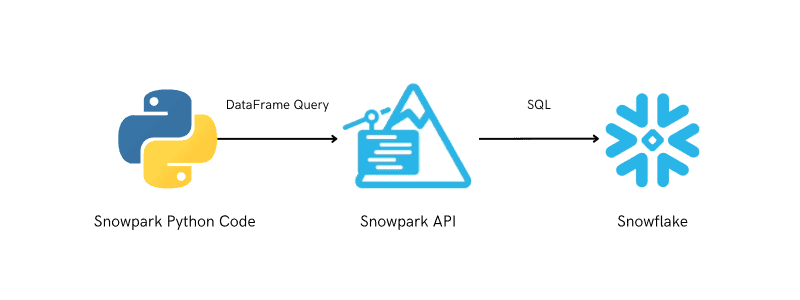
The Snowpark is an intuitive library that offers an API for querying and processing data at scale in Snowflake. It seamlessly integrates DataFrame-style programming into preferred languages like Python, Java, and Scala, and all operations occur within Snowflake using the elastic and serverless Snowflake engine. This eliminates the need of moving data to the system where your application code runs.
When developing Snowpark applications, there are some key concepts that are important to understand.
- The Snowpark API enables you to write code from your IDE or notebook in your preferred language and finally convert it into SQL to execute your code in Snowflake.
- A core abstraction in Snowpark is the DataFrame, representing a query in your chosen language.
- Snowpark does not require a separate cluster outside of Snowflake for computations. The queries built using Dataframes are converted to SQL, efficiently distributing computation in Snowflake’s elastic engine.
- Dataframes in Snowpark are executed lazily, running only when actions like retrieval, storage, or viewing of data are performed.
- Snowpark Dataframes are also run entirely within Snowflake ensuring data remains within unless explicitly requested by the application.
2. Setting up Snowpark Python Environment to connect Snowflake
The following are the prerequisites for setting up a local Python development environment to build applications using Snowpark.
- Install Python
- Install Snowpark
- Install Visual Studio Code
1. Installing Python
At the point of writing this article, the supported version of Python for Snowpark is 3.10. To know the latest supported version, please refer Snowflake Documentation.
Follow below steps to install Python on your Windows local computer.
1. Navigate to the official Python website. Click on Downloads and then select Windows.
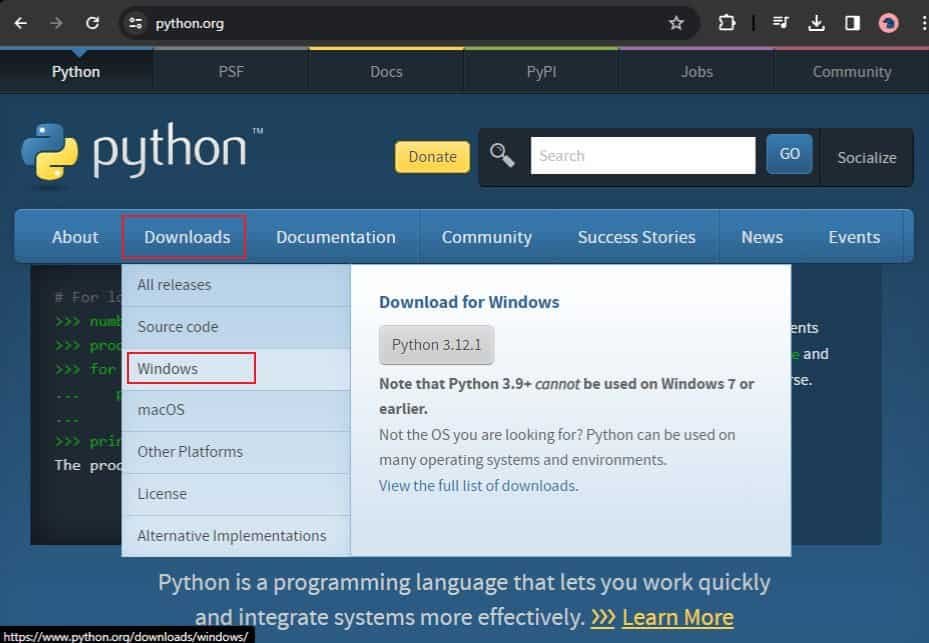
2. Navigate to the supported version of the Python in the downloads page and download the installer.
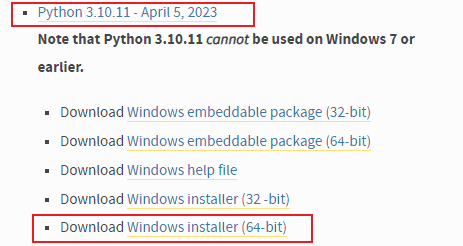
3. Once the executable file is downloaded completely, open the file to install Python.
4. In the installation wizard, verify the path where the installation files will be saved. Also, select the checkbox at the bottom to Add Python 3.11 to PATH and click Install Now.
5. Wait for the wizard to finish the installation process until the Set up was successful message appears. Click Close to exit the wizard.
6. To verify if Python is installed on your machine, issue the following command from the command prompt (start >> cmd) of your machine.
python --version2. Installing Snowpark
To install the Snowpark Python package, execute the following command from your command prompt window.
pip install snowflake-snowpark-pythonThe download begins and all the required packages are installed into your Python virtual environment.
Follow below steps to install PIP on your machine if it is not already installed before running the above given command.
1. Run the following cURL command in the command prompt to download the get-pip.py file
curl https://bootstrap.pypa.io/get-pip.py –o get-pip.py2. Once the download is complete, run the following Python command to install PIP.
Python get-pip.py3. Open a new command prompt window and run the following command to verify if PIP has successfully installed.
pip --version3. Installing Visual Studio Code
Visual Studio Code is the most popular code editor and IDE provided by Microsoft with support for development operations like debugging, task running, and version control.
Follow below steps to install Visual Studio Code on Windows.
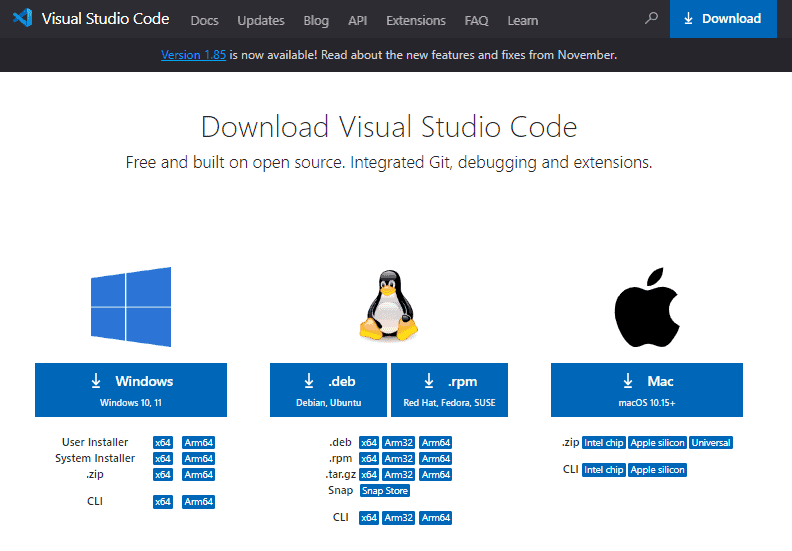
1. Navigate to the official website of Visual Studio code.
2. Click on the Download for Windows button on the website to start downloading the application.
3. Once the download finishes, Click on the installer icon to start the installation process of the Visual Studio Code.
4. In the installation wizard, agree to the terms and conditions, and proceed by clicking the “Next” and “Install” buttons on the subsequent pages.
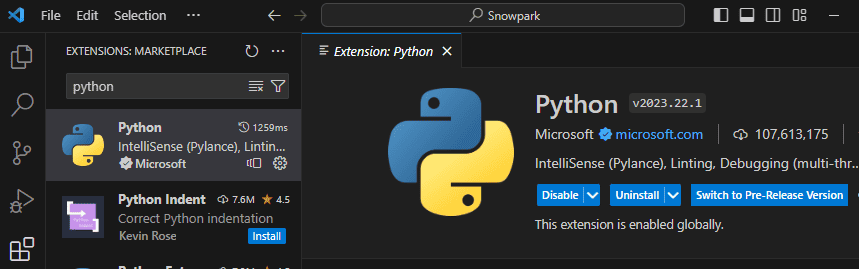
5. After successful installation of Visual Studio Code, go to the extensions tab in Visual Studio Code, search for the Python extension and install it.
6. The Python extension tries to find and select what it deems the best environment for the workspace. To manually specify the environment, press Ctrl+Shift+P to open the VS Code Command Palette and execute the command Python: Select Interpreter

7. The Python: Select Interpreter command displays a list of available global environments, select the python 3.10 environment which we set up in the first step.

3. Connecting Snowflake using Snowpark Python
To connect Snowflake using Snowpark Python in your application, the following steps need to be followed.
- Import Snowpark Libraries.
- Create Connection Parameters
- Create a Session
- Write your code
3.1. Import Snowpark Libraries
The first step is to import the Snowpark libraries that establish a session with the Snowflake database.
import snowflake.snowpark as snowpark
from snowflake.snowpark import Session
3.2. Create Connection Parameters
Create a Python dictionary containing the names and values of the parameters for connecting to Snowflake as shown below.
connection_parameters = {
   "account": "snowflake account",
   "user": "snowflake username",
   "password": "snowflake password",
   "role": "snowflake role",  # optional
   "warehouse": "snowflake warehouse",  # optional
   "database": "snowflake database",  # optional
   "schema": "snowflake schema"  # optional
}
3.3. Create a Session
Pass the connection parameters dictionary to the Session.builder.configs method to return a builder object that has these connection parameters.
Call the create method of the builder to establish the session as shown below.
new_session = Session.builder.configs(connection_parameters).create()3.4. Write your code
Once the connection is established, write the code on database objects.
The following code prints the current database and schema details which are used in the session created.
print(new_session.sql("select current_database(), current_schema()").collect())The following code creates a dataframe on the database table named campaign_spend and prints the first 10 rows.
df_campaign_spend = new_session.table('campaign_spend')
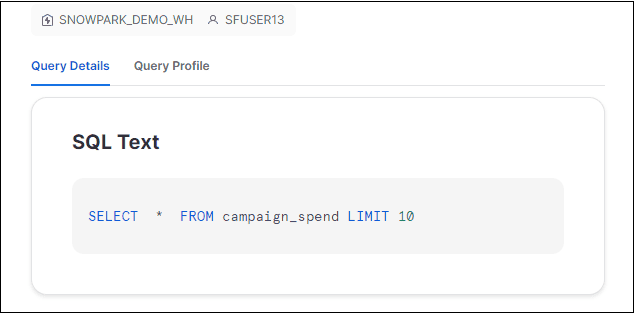
df_campaign_spend.show()As discussed, the DataFrames in Snowpark are executed lazily. In this case, no action is performed when the dataframe is created. Only when we call the show function, the dataframe is converted into a SQL query and is executed against the database defined.
The below image shows the DataFrame executed in the application is converted into a SQL query in Snowflake as shown below.
Here is the sample Snowpark code which connects to Snowflake and prints the contents from a table.
import snowflake.snowpark as snowpark
from snowflake.snowpark import Session

connection_parameters = {
   "account": "qokbyrr-ag94793",
   "user": "SFUSER13",
   "password": "Abc123",
   "role": "ACCOUNTADMIN",
   "warehouse": "SNOWPARK_DEMO_WH",
   "database": "SNOWPARK_DEMO_DB",
   "schema": "SNOWPARK_DEMO_SCHEMA"
}

new_session = Session.builder.configs(connection_parameters).create()

print(new_session.sql("select current_database(), current_schema()").collect())

df_campaign_spend = new_session.table('campaign_spend')
df_campaign_spend.show()
Below is the output of the Snowpark application code.
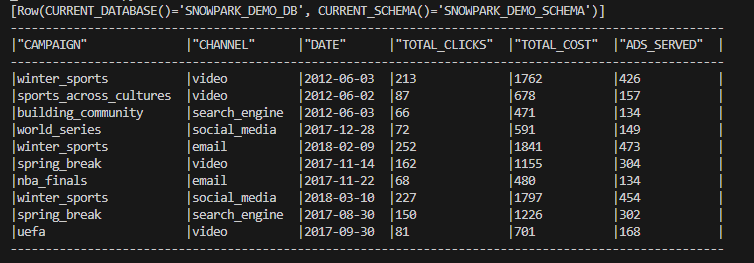
Here, the application code is run on your local machine, but the actual query execution is performed within Snowflake.
4. Writing Snowpark Code in Python Worksheets
Snowflake supports writing Snowpark code in Python worksheets to process data using Snowpark Python in Snowsight. You can conduct your development and testing in Snowflake without the need to install dependent libraries by writing code in Python worksheets.
4.1. Creating Python Worksheets
To start coding in Python worksheets, in Snowsight, open Worksheets, simply click + to add new worksheet, and select Python Worksheet.
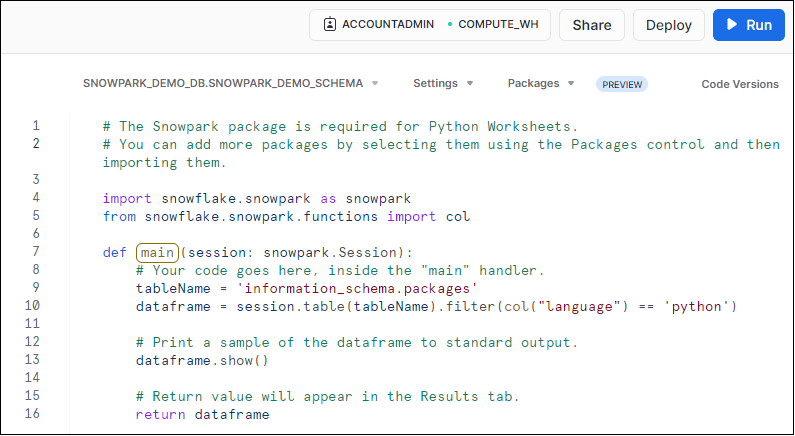
The below image shows the default code with which the Python worksheet is created in Snowsight.
4.2. Writing Snowpark Code in Python Worksheets
In the Python Worksheets, the Snowpark Python code is written inside the handler function.
import snowflake.snowpark as snowpark

def main(session: snowpark.Session):
# your code goes here- The default handler function is main, but you can change it in the Settings for the worksheet. The active handler is highlighted in the worksheet.
- Use the session object to access data in Snowflake with the Snowpark API libraries.
- After you write your code in the Python worksheet, select Run to run your Python worksheet.
4.3. Snowpark Python Packages for Python Worksheets
The snowflake-snowpark-python package is required and always installed for Python worksheets.

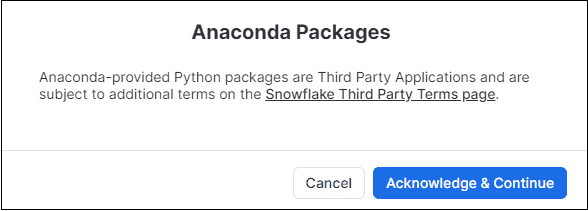
To use Anaconda provided packages in Python Worksheets, you must enable the packages by accepting to the terms.
To accept the terms, in Snowsight, go to Admin > Billing & Terms. In the Anaconda section, select Enable.
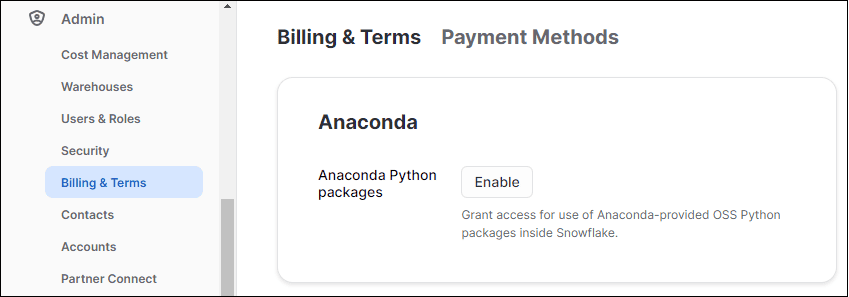
In the Anaconda Packages dialog, select Acknowledge & Continue.
5. Closing Thoughts
While there is much more to cover on Snowpark, I trust this article has offered you a fundamental understanding, particularly beneficial for individuals without a programming background. It aims to assist you in initiating your Snowpark learning journey and building a solid foundation for exploring its capabilities.
Watch this space for more informative content on Snowflake Snowpark !!
Subscribe to our Newsletter !!
Related Articles:
- Introduction to Snowflake Snowpark for Python
- HOW TO: Create and Read Data from Snowflake Snowpark DataFrames?
- HOW TO: Write data into Snowflake from a Snowpark DataFrame?
- HOW TO: COPY Data from CSV Files INTO Snowflake Table using Snowpark?
- HOW TO: Add a New Column to a Snowpark DataFrame?
- HOW TO: Drop a Column from a Snowpark DataFrame?
- HOW TO: Remove Duplicates in a Snowflake Snowpark DataFrame?
- HOW TO: Update a DataFrame in Snowflake Snowpark?
- HOW TO: Delete Rows From a DataFrame in Snowflake Snowpark?
- HOW TO: Merge two DataFrames in Snowflake Snowpark?
- HOW TO: Execute SQL Statements in Snowflake Snowpark?
- Aggregate Functions in Snowflake Snowpark
- GROUP BY in Snowflake Snowpark
- Joins in Snowflake Snowpark
- IN Operator in Snowflake Snowpark
- Window Functions in Snowflake Snowpark
- CASE Statement in Snowflake Snowpark
- UDFs in Snowflake Snowpark