Introduction
In our previous article we have discussed how to configure Amazon S3 v2 connector using Basic authentication method with help of access key values. If you do not want to provide the access key and the secret key in the connection, you can configure IAM authentication when the Secure Agent runs on an EC2 instance.
When the Secure Agent is installed on an Amazon Elastic Compute Cloud (EC2) instance, you can use IAM Roles to grant permissions to the instance to access buckets in Amazon S3 without the need of configuring the access key values. You assign permissions for IAM roles by creating a policy in JSON format and attaching to roles.
In this article let us discuss how to connect to AWS S3 storage from Informatica Cloud using IAM Authentication method.
Step-1: Create a Role
Instead of creating a user and sharing AWS credentials, you can delegate permission to make API requests using IAM roles as follows.
1. Go to IAM > Roles > Create role.
2. Select Trusted entity type as AWS service.
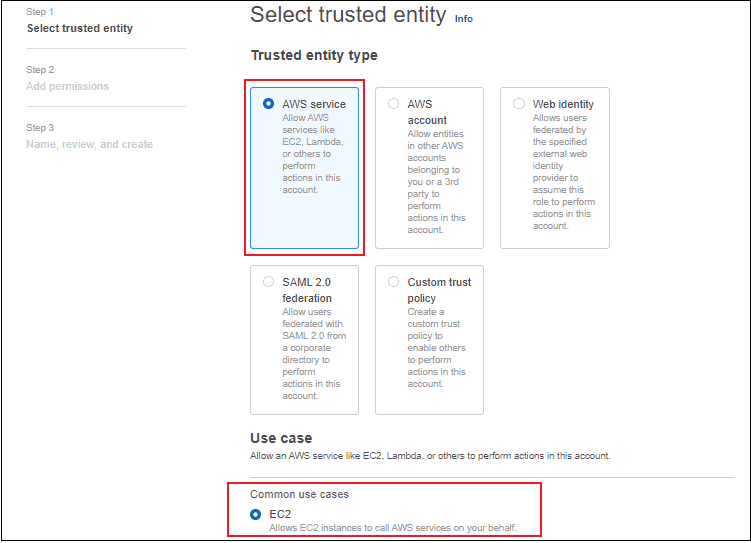
Note: If your EC2 instance where secure agent runs and the S3 bucket are present in two different AWS accounts, select AWS account as Trusted entity type. You need to pass the Account ID details of the AWS account where EC2 runs.
3. Select the Use case as EC2 and click Next.
4. Select the policy which grants the permissions to access required S3 buckets for the IAM Role.
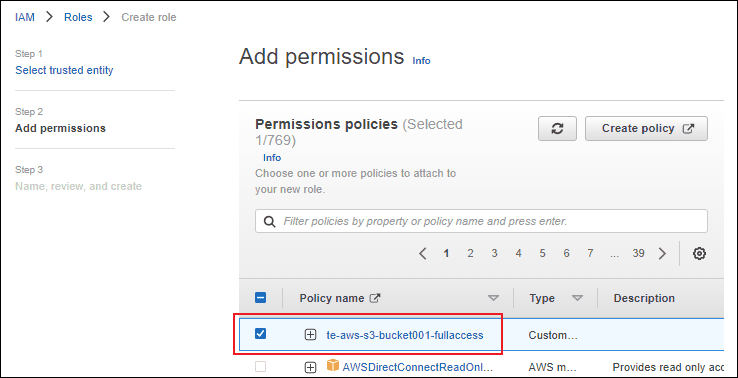
In this case I am going to select the custom policy created in previous steps which provides full access to the bucket te-aws-s3-bucket001.
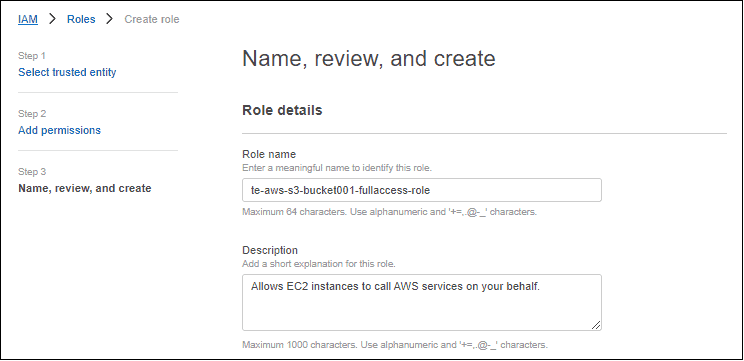
5. Enter the Role name and click Create role.
Understanding Trust Relationships
A Trust relationship defines which principals can assume the role, and under which conditions.
To verify the trust relationship policy of the role, navigate to IAM > Roles >select the Role name and go to Trust relationships.
{
    "Version": "2012-10-17",
    "Statement": [
        {
            "Effect": "Allow",
            "Principal": {
                "Service": "ec2.amazonaws.com"
            },
            "Action": "sts:AssumeRole"
        }
    ]
}
Since we have selected the trusted entity type as EC2 AWS service, a trust relationship policy is created inside the role which trusts only the EC2 services to assume the role created.
Under Permission tab, we can see the policy which specifies the permissions the service gets once it assumes the role.
Step-2: Assign the role to EC2-Instance
Follow below steps to assign an IAM role to an EC2 Instance
1. Go to EC2 > Instances and select the EC2 instance where the secure agent runs.
2. On the top right menu select Actions > Security > Modify IAM role.
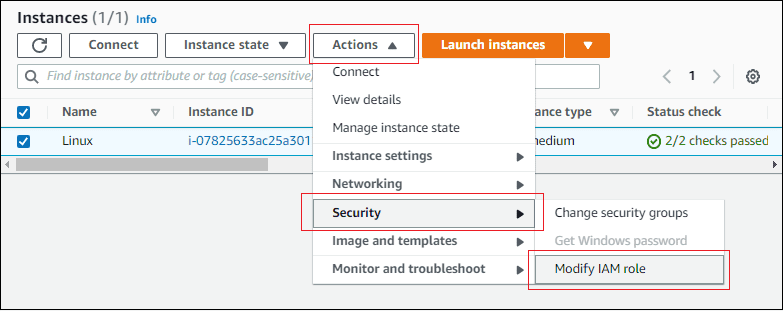
3. Select the IAM role created in earlier step and click Update IAM role.
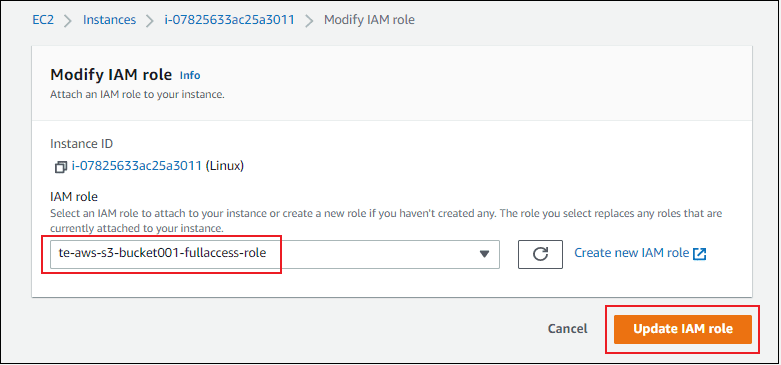
Now the EC2 Instance and all the underlying applications (including IICS Secure Agent) inside it can access the required S3 bucket by assuming the role attached through AWS Security Token Service (STS).
The STS AssumeRole returns a set of temporary security credentials that you can use to access AWS resources that you might not normally have access to. These temporary credentials consist of an access key ID, a secret access key, and a security token and are valid for a limited period of time.
Step-3: Configuring Amazon S3 v2 Connector in Informatica Cloud
Follow below steps to create an AWS S3 v2 Connector using IAM Authentication in Informatica Cloud.
1. Go to Administrator > Connections > New Connection.
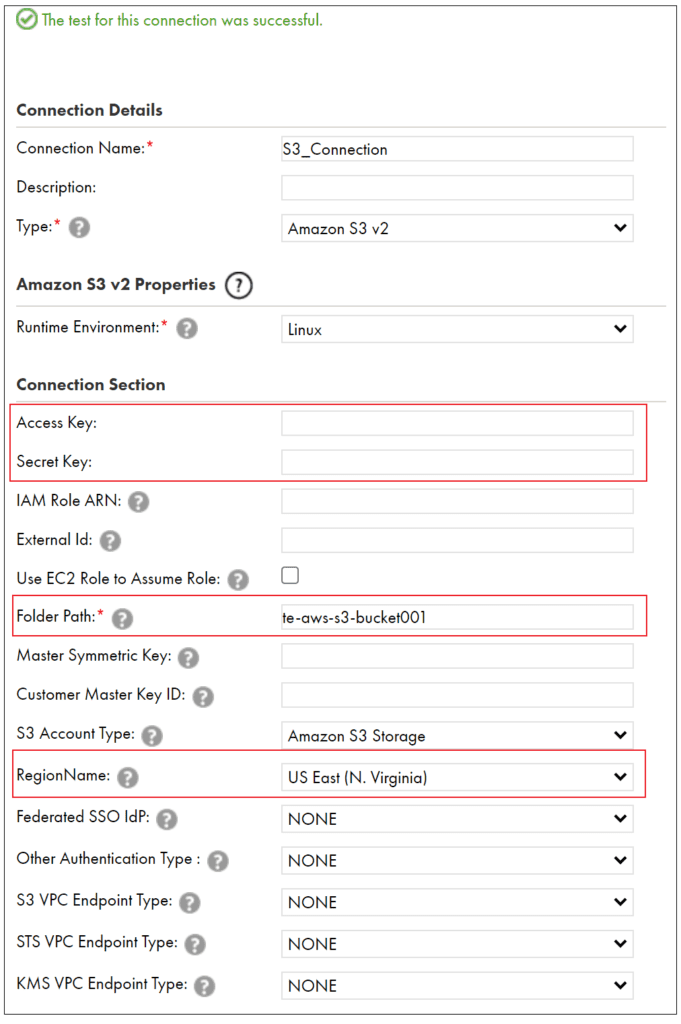
2. Enter the Connection Name and select the connection type as Amazon S3 v2
3. Select the Runtime Environment where you want to run the tasks.
4. Do not enter the Access Key and Secret Key values.
5. Enter the bucket name or complete folder path to the Amazon S3 objects. Don’t use a slash at the end of the folder path.
6. Select the region of the bucket that you want to access.
7. Leave the rest of the properties in default state, test the connection and save it.
Note that when you use a serverless runtime environment, you cannot configure IAM authentication.
Conclusion
This method of authentication lets us configure the connection without the need of entering the access key and secret key values in the connection. Though this method looks more secure and easy to configure, it is not recommended to use in certain situations.
Example, when another application running on your EC2 instance requires full S3 access and you modify the policy to give full S3 access, the secure agent also inherits the permissions to access all S3 buckets though you need access only to a specific bucket from Informatica.
To avoid such scenarios you can let the EC2 to assume a different role when connected from Informatica though a different role is already attached to the EC2 instance by specifying the IAM Role ARN in the connection. Let us discuss more about this method in the next article.
Subscribe to our Newsletter !!
Related Articles:

Learn how to create Amazon S3 v2 Connection in Informatica Cloud with Basic Authentication method using Access Keys.

Learn how to create Amazon S3 v2 Connection in Informatica Cloud with IAM Authentication method using IAM Roles.

Learn how to create Amazon S3 v2 Connection in Informatica Cloud using Temporary security credentials via AssumeRole