Data Integration tasks such as Synchronization task, Mapping task, Replication task etc. have inbuilt dedicated tab within them to schedule the task. Linear Taskflows also have an option to select a schedule while assigning tasks within them.
Taskflow or an advanced taskflow do not have an option within the design canvas to assign a schedule. They can be scheduled directly from the Explore tab.
A taskflow can be scheduled by
- Assigning a schedule pre-defined in Administrator.
- Creating a new schedule at runtime while scheduling the taskflow.
Steps to Schedule a Taskflow in IICS
To schedule a taskflow in Informatica Cloud, follow below steps
1. Login to IICS org.
2. Navigate to Data Integration > Explore
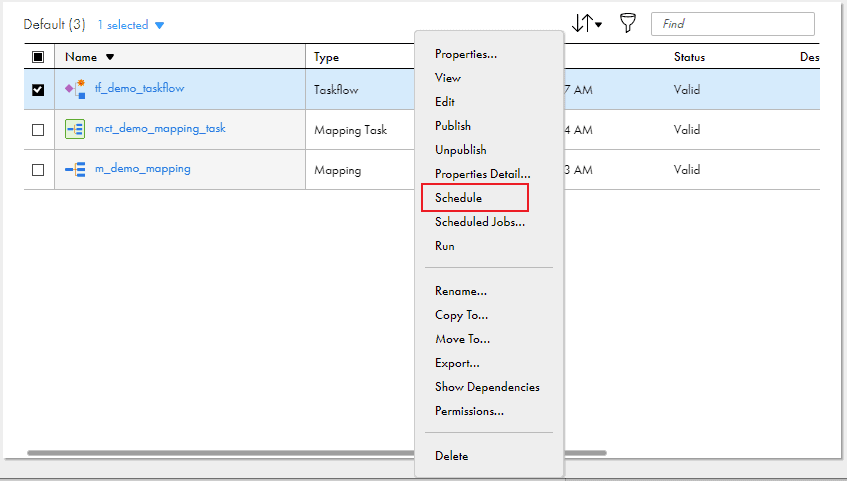
3. Select the taskflow you want to schedule from its Project/Folder.
4. Either Right click on the selected taskflow or click on the Action menu (three dots) next to the taskflow.
5. Select the Schedule option.
6. From the scheduling dialog box, you can either select a Schedule created earlier (or) create a New Schedule.

7. Enter a name for the schedule job under Job Name.
8. Click on Assign Schedule to save the job.
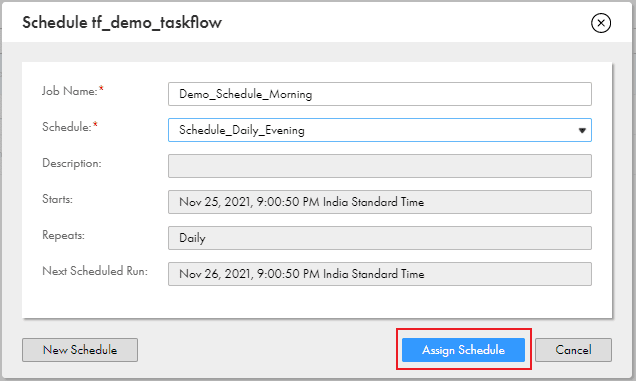
9. This will create a Schedule Job which runs taskflow on selected Schedule.
Multiple Schedules can be assigned to a single taskflow by creating multiple Schedule Jobs.
How to Unschedule a Taskflow in Informatica Cloud?
To Unschedule a taskflow in Informatica Cloud, follow below steps
1. Login to IICS org.
2. Navigate to Data Integration > Explore
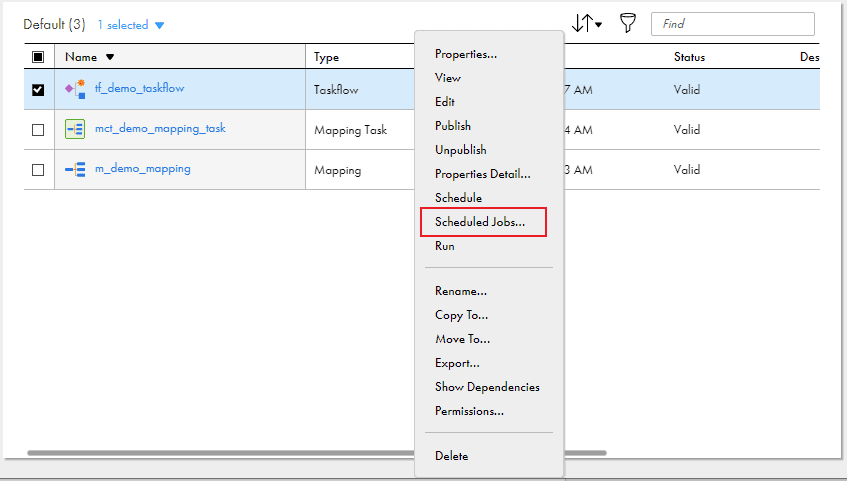
3. Select the taskflow you want to unschedule from its Project/Folder.
4. Either Right click on the selected taskflow or click on the Action menu (three dots) next to the taskflow.
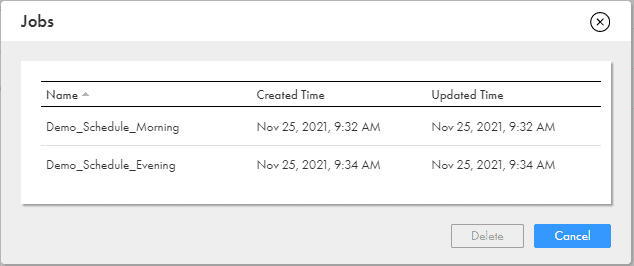
5. Select the Scheduled Jobs option.
6. A dialogue box will pop up listing all the jobs that are scheduled to run the taskflow.
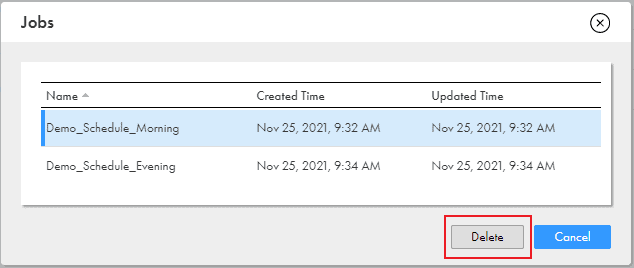
7. Select the Job that is assigned to the particular schedule you wanted to unschedule and click Delete.
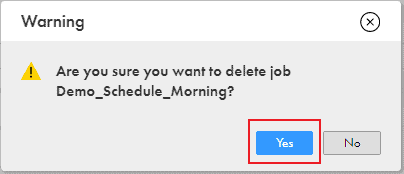
8. A dialog box will up to confirm the schedule deletion. Click Yes.
The Schedule that was assigned to the taskflow will now be unlinked and the taskflow will not run on schedule.