
1. Introduction
Fixed-Width files are different from delimited files where the column separation is defined by a delimiter which could a comma, tab, pipe etc.
In Fixed-Width files, the columns are not separated by any delimiter. Instead the width of each column stay constant for all the rows. That means if a column has a defined length of 10 characters and only 3 characters are filled in for a row. The rest of the 7 characters will still present as empty in the row.
So these files cannot be read like regular delimited files in Informatica. A different approach is necessary to read these fixed-width files.
The Steps to read a Fixed-Width file in Informatica Cloud are
- Step-1: Create Fixed-Width File Format component.
- Step-2: In Source transformation, under Formatting Options and select the Flat File Type as Fixed Width.
- Step-3: Select the Fixed-Width File Format component created in the earlier step.
- Step-4: Remove extra spaces from source data in expression transformation.
- Step-5: Map the source fields to the required target object.
Let us discuss in detail how to read a fixed-width file in Informatica Cloud with an example.
2. Understanding Fixed-Width File Format of the Source File
Consider below as the source data.

If you notice the data is perfectly aligned and there are lot of visible spaces. This is because each field has its own defined length.
If the field value is less than the length defined for it, the rest of the characters are left with spaces (as shown in our source data). If the field value is more than the length defined for it, the field value until the length defined gets loaded and rest of the characters are lost.
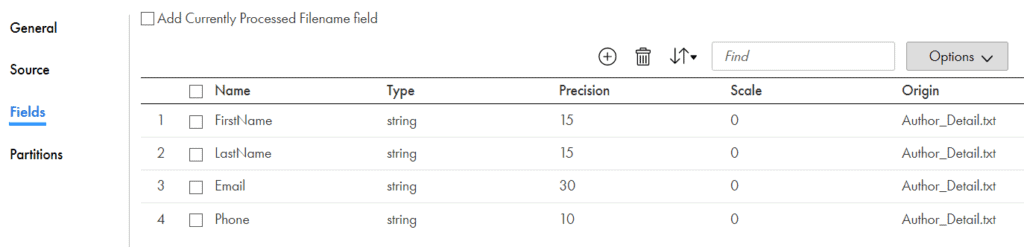
The first column represents the Firstname of length 15. The second column represent Lastname of length 15. The third column is Email of length 30 and the fourth column is Phonenumber of length 10.
3. Creating a Fixed-Width File Format Component
In order to read a fixed-width file in IICS, you must first create a reusable Fixed-Width File Format Component which can be later used in the mappings as a reference to read your source file.
This is similar to creating a Hierarchical Schema which later be used in a Hierarchy Parser or Hierarchy Builder transformations to process JSON/XML files.
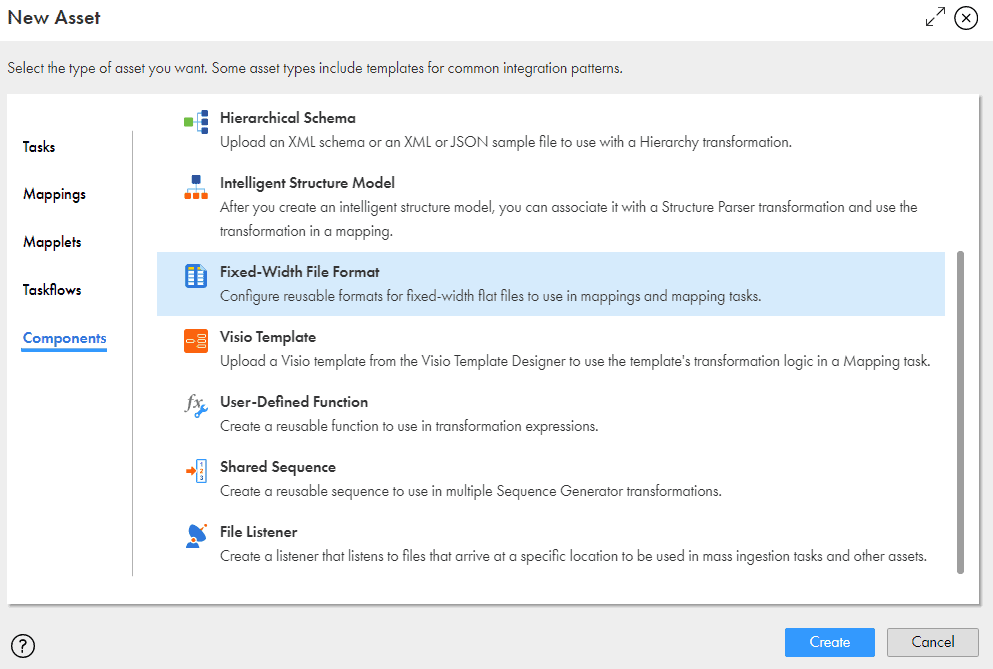
To create a Fixed-Width File Format Component, login to Data Integration > click on New > navigate to Components > select Fixed-Width File Format and click Create.
3.1 Select a Sample File
Enter the Name of the Fixed-Width File Format.
Select the Flat File connection at which the sample file is placed and select the sample file (in our case the source file is used as sample file)
A Sample file defines your source file structure. It could be a dummy data with just one row.
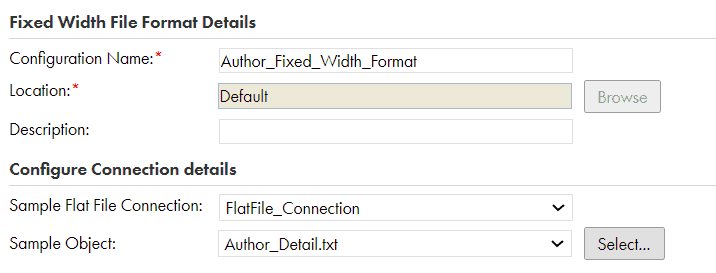
It is not mandatory to use a sample file but it is recommended.
3.2 Define Column Boundaries
Next we need to define the Column Boundaries as shown below. All you need to do is click on the number at which a column ends. The blue lines as shown below automatically pops up and the boundary values (15,30,60,70) are auto populated.
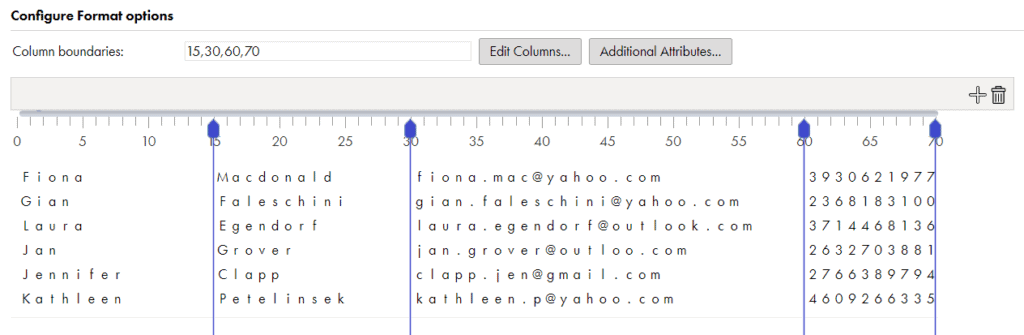
You can still define the column boundaries without a sample file by clicking on the boundary numbers. But if there is a sample file it becomes visually easy to configure.
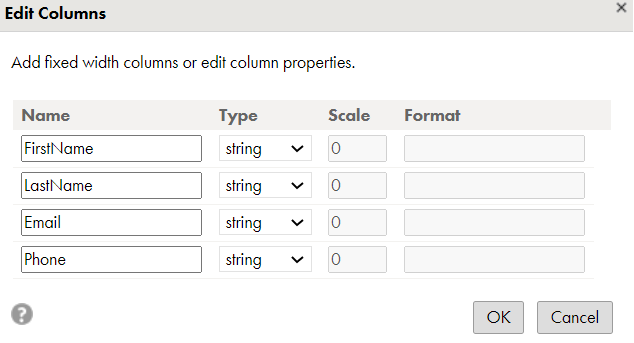
3.3 Edit Column Names
In the tab where Column Boundaries are defined, click on Edit Columns.
The default column names will be COLUMN_{number}. You can edit the names to identify the columns easily. You can also change the datatype of the column.
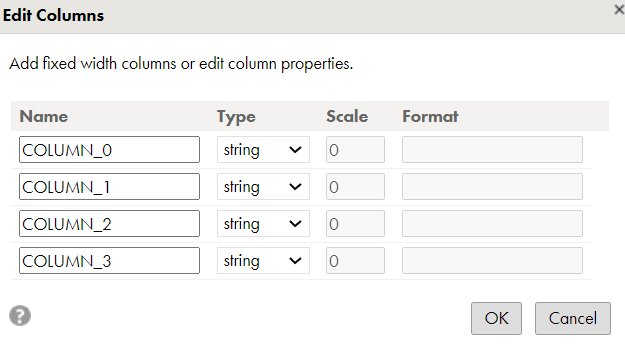
I have renamed the columns according to the source data as below and saved it.
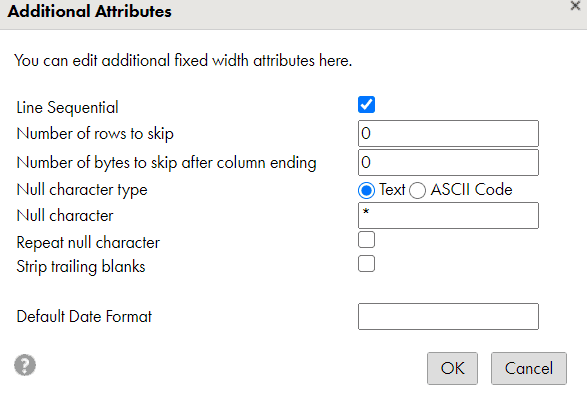
3.4 Configure additional attributes
You can configure some additional settings by clicking on Additional Attributes in the tab where you defined column boundaries.
You can mostly leave the settings as it is. If your source data contains a header, them modify the Number of rows to skip to 1.
4. Create a Mapping to read Fixed-Width file
4.1 Configuring Source transformation
Select the flat file connection where the source file is placed and the select the source object.

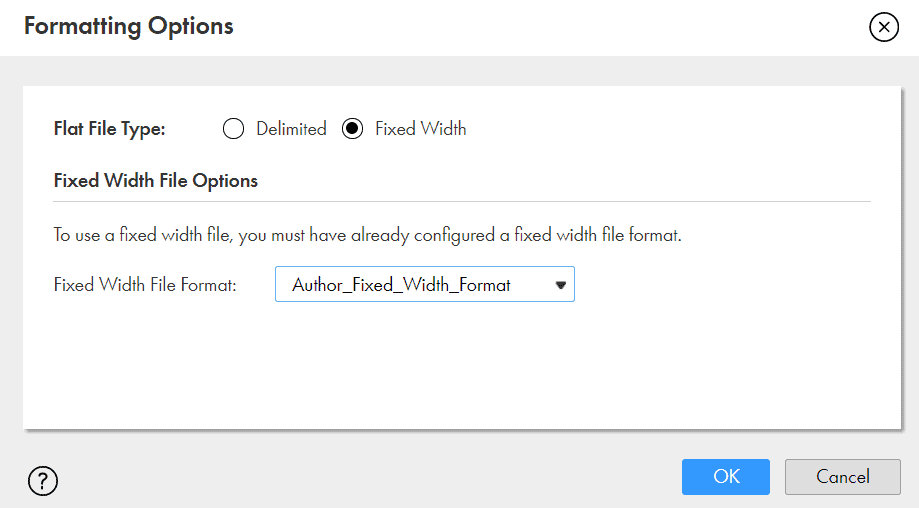
Click on Formatting Options and select the Flat File Type as Fixed Width. From the drop down select the Fixed-Width File Format we created in the earlier step as shown below.
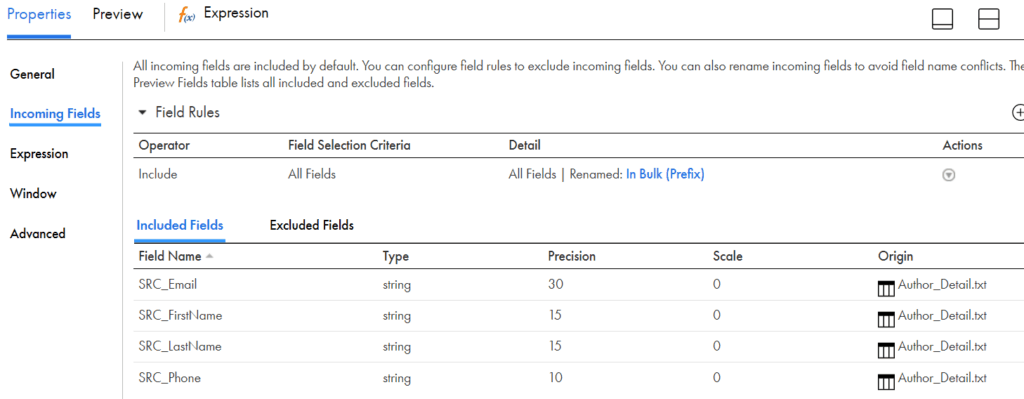
Click on Fields tab to verify the source fields and their precision.
4.2 Configuring Expression Transformation to remove the extra spaces
Pass the data from source to an expression transformation.
The data read from the source file still contains the extra spaces which needs to be removed before loading into target. We can use Trim functions in expression transformation to remove the spaces.
Since the fields created in expression are same as source fields, there will be a Field conflict in expression. So rename all the fields read from source transformation by adding a prefix ‘SRC_’
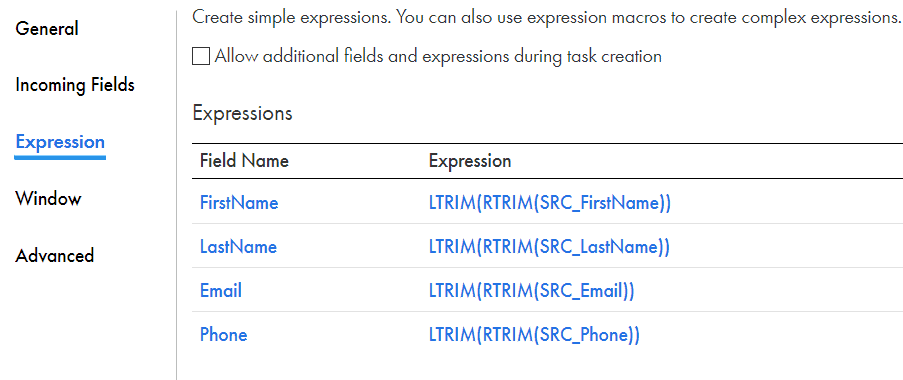
In the Expression tab create new fields and remove the extra spaces by using Trim functions.
4.3 Configuring Target Transformation
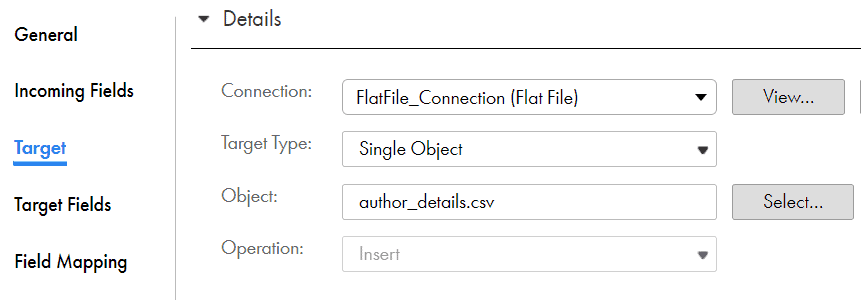
Pass the data from expression to a target transformation.
Create a dynamic flat file target author_details.csv and save the mapping.
Run the mapping and the final output we get will be as below.
Contents of author_details.csv file
"FirstName","LastName","Email","Phone"
"Fiona","Macdonald","fiona.mac@yahoo.com","3930621977"
"Gian","Faleschini","gian.faleschini@yahoo.com","2368183100"
"Laura","Egendorf","laura.egendorf@outlook.com","3714468136"
"Jan","Grover","jan.grover@outloo.com","2632703881"
"Jennifer","Clapp","clapp.jen@gmail.com","2766389794"
"Kathleen","Petelinsek","kathleen.p@yahoo.com","4609266335"
So the data is loaded as expected and all the extra spaces in the source files are now removed.
5. How to create a Fixed-Width File in Informatica Cloud?
Now that we know how to read a fixed-width file in Informatica Cloud, let us also discuss how to write data into a fixed-width file in Informatica Cloud.
The process is simple and similar to how you define your source transformation to read a fixed-width File.
You still need to have a Fixed-Width File Format Component already created for the target fixed-width file you want to create.
In the target transformation, after you select your flat file connection and the target object, click on Formatting Options. Select the Flat File Type as Fixed Width. From the drop down select the Fixed-Width File Format created for your target.
6. Conclusion
The Fixed-Width File Format component created can be used in any number of mappings and if there is any change in the source file structure it can be easily modified from the component created. The changes can then be easily passed to mappings which use this Fixed-Width File Format component by refreshing the source/target fields.
Subscribe to our Newsletter !!
Related Articles:

The connections in IICS CDI can be parameterized at mapping level which needs to be resolved at MCT level. But you can override the values at MCT level using parameter file.

When Enable High Precision property should be enabled and how it resolves the decimal precision loss or rounding issue in Informatica Cloud

The process to read JSON files from AWS S3 using IICS is different reading from Secure agent machine. Learn how to read JSON files from AWS S3 using different methods.


How to right align the value of a specific column? For Ex: if i have amount as “500” from source and field length is 10. I should print like ” 500″. How to do that?
Try to use LPAD function.