
Introduction
A trial account is a great way to get introduced to the tool and evaluate the features to see if it meet your needs. Snowflake also provides a free trail account which lasts for 30 days and you will get a $400 of free usage credits.
To sign up for a Snowflake free trial account, all you need is a
- Valid email address.
- No payment information required.
Steps to Sign Up for Snowflake Free Trail Account
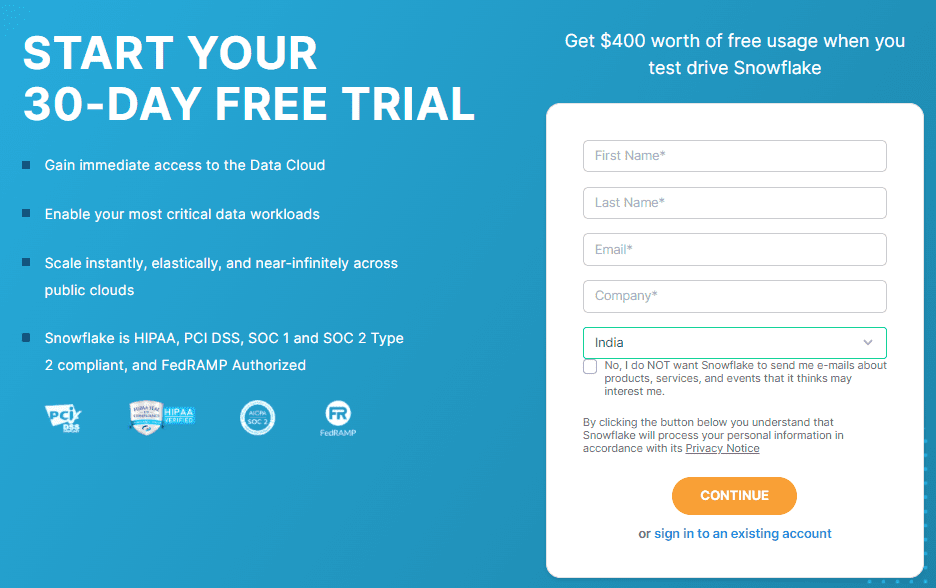
STEP-1: Fill the self-service form on Snowflake website
Navigate to Snowflake Website – https://signup.snowflake.com/
Enter the details (First Name, Last Name, Valid Email Address and Company) in the Sign Up form. If you are not working or do not wish to share the information of Company you are working, you can enter any random name or just mention ‘Student’.
Select your location and click CONTINUE.
STEP-2: Select Snowflake Edition, Platform and Region
After entering standard information on the first page of the form, you need to select the following which determines the features you can use during the trial and click GET STARTED.
- Snowflake Edition
- Cloud Platform
- Geographic Deployment Region
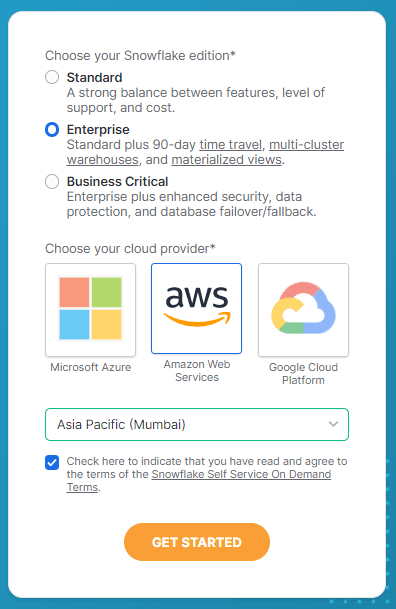
Snowflake Edition
- The Snowflake Edition that you choose determines credit usage and the features that are available.
- Enterprise Edition provides balance of all features and services. Business Critical Edition, offers even higher levels of data protection to support the needs of organizations.
- Unless you are specifically choosing to test features from Business Critical Edition, choose Enterprise Edition.
Cloud Platform Provider
- Snowflake could not operate without an underlying cloud provider infrastructure – Amazon Web Services (AWS), Microsoft Azure and Google Cloud Platform (GCP).
- After choosing your infrastructure provider, you do not interact with the cloud provider and you are not charged by them in the management of your Snowflake account.
Geographic Deployment Region
- Cloud Providers have Deployment Regions, so Snowflake has Deployment Regions.
- Deployment Regions are set by the Cloud Provider so your choice of regions is different depending on which Cloud Provider you choose.
- It is recommended to choose a region close to your physical location. This reduces latency.
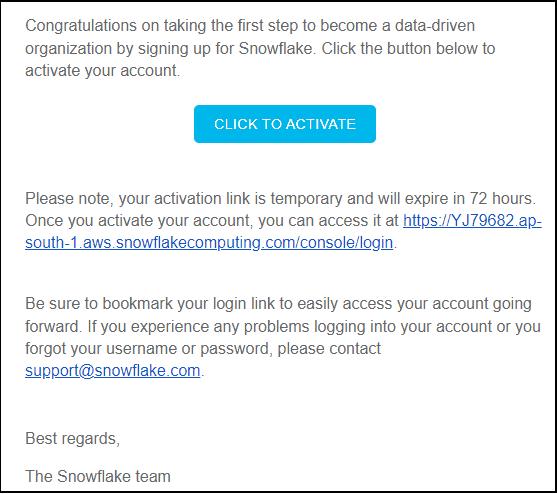
STEP-3: Activate your account.
After completing the step-2, you will receive a message stating that an email has been sent to activate your account.

Navigate to your email and click on CLICK TO ACTIVATE. You will also find the URL to access your Snowflake account in the email.
STEP-4: Create Username and Password
Once you activate your account, you will be prompted to choose a Username and Password to get started. These credentials are required to login every time you need to access Snowflake.
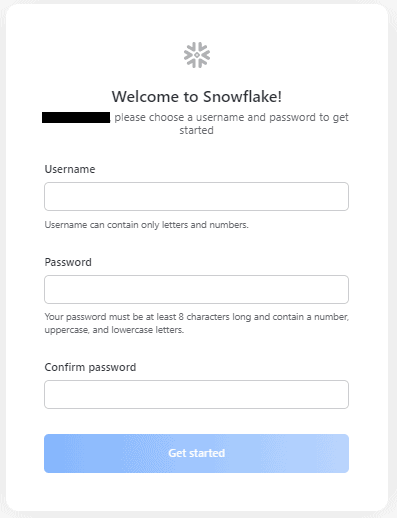
After successfully creating a Username and password, you will be asked to sign in. Sign in using the credentials created.
Summary
Key details about Snowflake Free Trail Account
- The Snowflake free trail account includes $400 worth of credits for a 30 day period, whichever occurs first.
- Trial can be started using any Snowflake edition, cloud platform, or region.
- At the end of the trial, your account will be suspended. You can still log into a suspended account, but you cannot use any features.
- Once the trial is over, the account can be converted to a paid account by adding credit card details.
Related Articles: